Since middle school, I’ve always felt that there was one school supply that I just couldn’t find anywhere; a customizable and convenient notecard holder. I tried hollowing out pocket dictionaries to hold my flash cards or reminders, but it always ended up being a mess or falling apart soon after. After getting a care package from my grandma (thanks for the snacks, Grace!), I finally decided I wasn’t going to put up with losing any more of my organic chemistry notecards.
What you’ll need:
- 15″ x 15″ cardboard (I used one side of a medium priority box)
- Ruler
- Pencil
- Ballpoint pen
- Scissors or box-cutter
- acrylic paint
- Super glue (or hot glue)
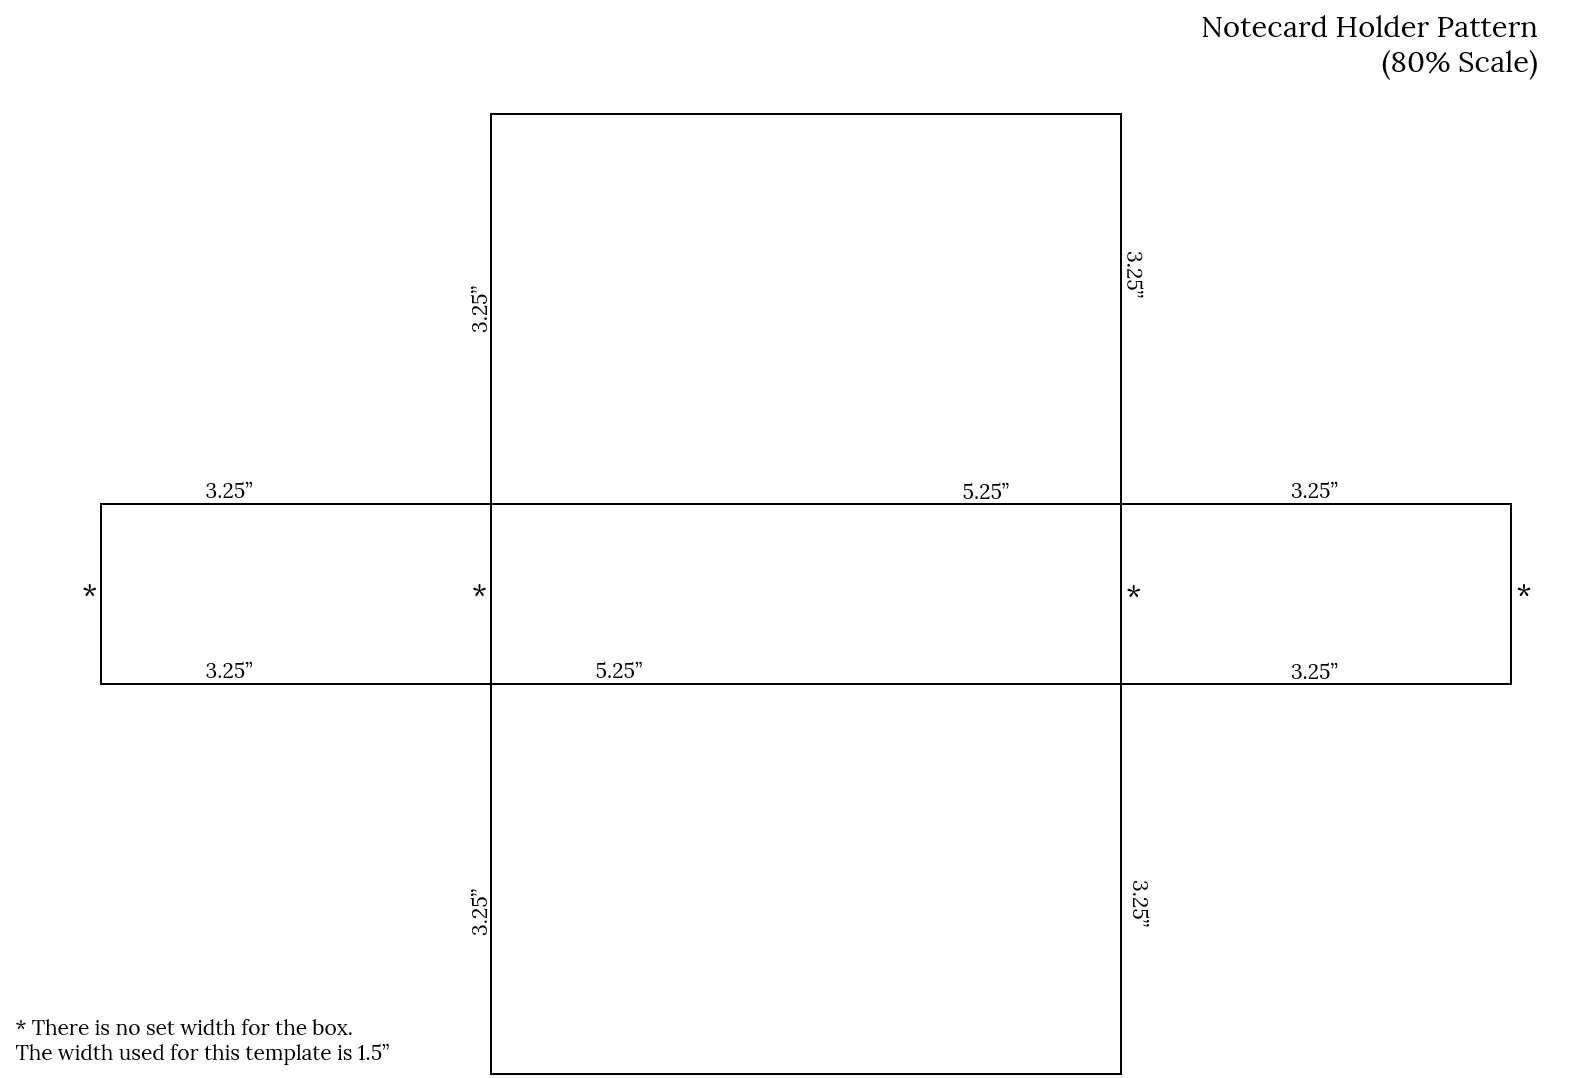
You can change the width of your box depending on how many cards you need to store. The ratio is approximately 80 cards per inch. The box I use for my organic chemistry notecards (the smaller one) is 1.5″.
It is easiest to start by using one of the two horizontal folds on the box panel. This way you will have a line to draw along, and it will be one less fold you’ll need to make later on. After you finish copying the pattern onto your cardboard, cut along the outside lines of the shape. You should have a rectangular shape with two flap-like pieces when you’re done.
Now you may be thinking, “how am I supposed to fold this thing accurately?”
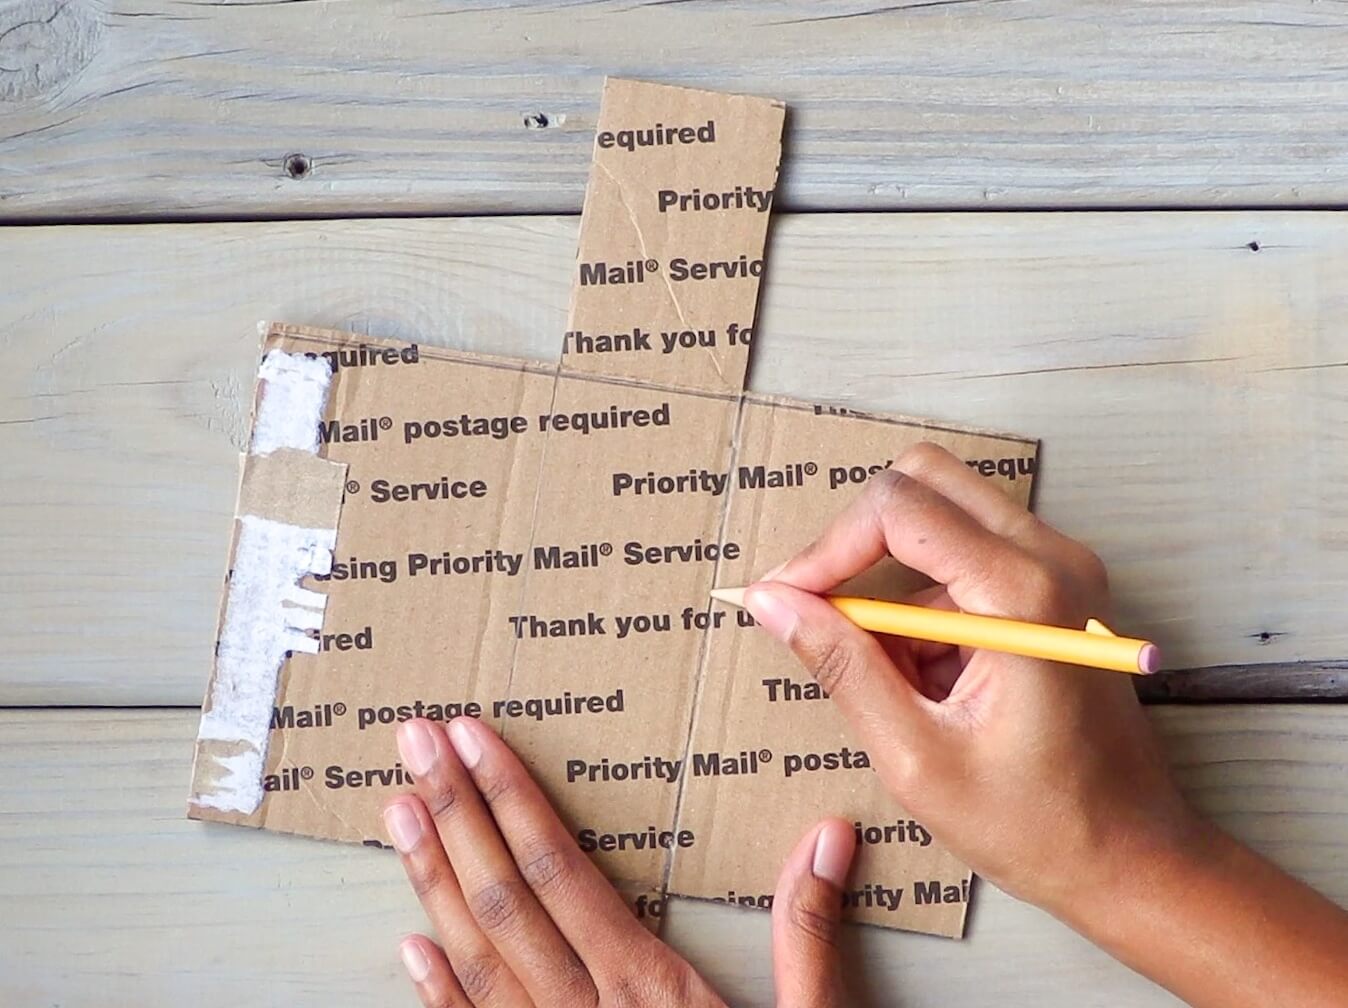
One easy trick is to use a dull point, like a ballpoint pen (I used a broken mechanical pencil that I had lying around), to go over the lines you plan on folding. Apply just enough pressure to leave an indentation in the top layer of cardboard. Try to avoid making any holes. Fold the cardboard along the indented fold lines. If the dimensions of your box are correct, all of the sides should line up.
Before going on to the next step, make sure to remove any tape or excess cardboard from the box. If it does not come off easily, go ahead and leave it on. If you accidentally remove the top layer of cardboard, it will be more difficult to cover than the excess tape or paper.
When both sides of the cardboard are clean, add a generous coat of paint to the inside part of the box. It doesn’t need to be precise, since it will be on the inside, but this covers any writing or patterns that may have been on the cardboard.
You can chose to paint the outside of your box now or wait until it is completed. Keep in mind that it may be more difficult to paint all five sides at the same time, or apply a significant amount of pressure once it is folded. I typically do two generous coats of paint before gluing, then do a third coat and touch-ups once it is folded.
To glue the box together, I prefer to use gel super glue (mostly because I don’t have a hot glue gun on hand). You may want to wear gloves, especially if you have sensitive skin, because some glue may get on your fingers. I was personally able to do a good job keeping my hands clean during this project, and I’m typically covered with paint and super glue by the end of most.
It is easier to put glue on the box body rather than on the flap pieces, and to line up the flap edge on top of the glue. When doing the first side of the box, you only need to glue one edge at a time. To complete the box, glue the remaining two edges at the same time. The super glue does dry fast, so make sure to attach the pieces quickly once you have added glue.
Hold each edge glued for about 15-20 seconds to make sure that the bond has formed. The glue should be dry enough for you to begin using the box after 5-10 minutes. If you have not already, go ahead and paint your box and do any touch-ups you may want to do before using your box.
I hope you find this box as helpful as I did to keep your desk tidy and all of your notecards in one place!
